

Table of contents
OSI Model:-
- Physical Layer :- Physical Layer used transfer bit stream over wire3
- Data Link Layer : Defines the format of data on the network
- Network Layer :- Decides which physical path the data will take
- Transport Layer :- Transmit data using transmission protocols including TCP & UDP
- Session Layer :- Maintains connections and is responsible for controlling ports and sessions
- Presentation Layer :- Ensures that data is in usable format and is where data encryption occurs
- Application Layer :- Human-computer interaction layer, where applications can access the network services.
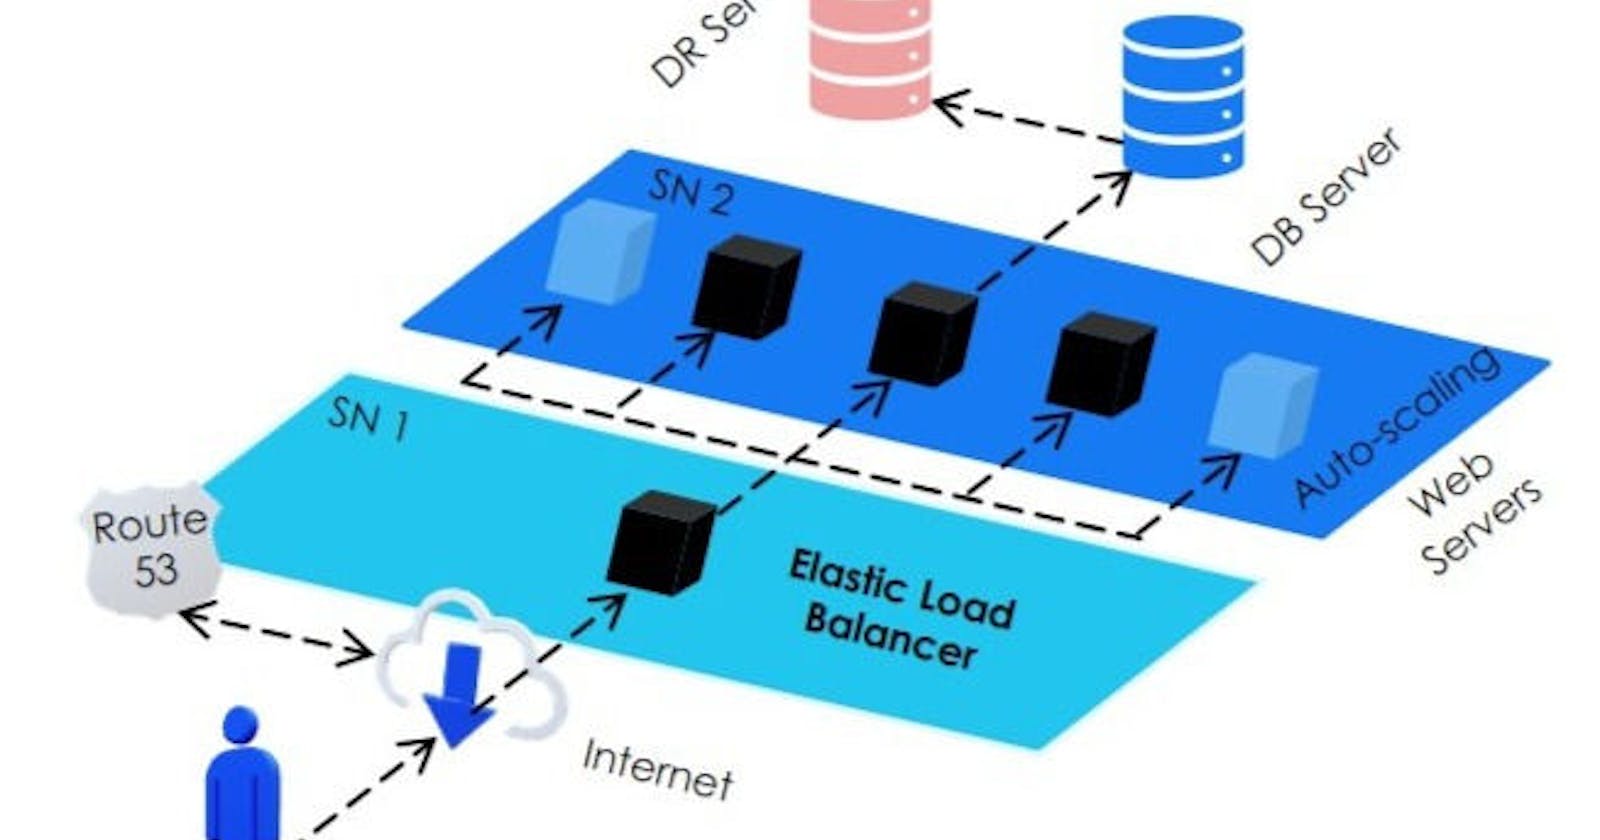
What is load balancing? :-
Elastic Load Balancing automatically distributes your incoming traffic across multiple targets, such as EC2 instances, containers, and IP addresses, in one or more Availability Zones. It monitors the health of its registered targets, and routes traffic only to the healthy targets.
Creat Your Apache Server
Create an Application Load Balancer - Elastic Load Balancing Using AWS EC2 Instance.
1) You Have To Create Two EC2 Instance For Balancing the load between them. Create An Instance And Host Apache Server.

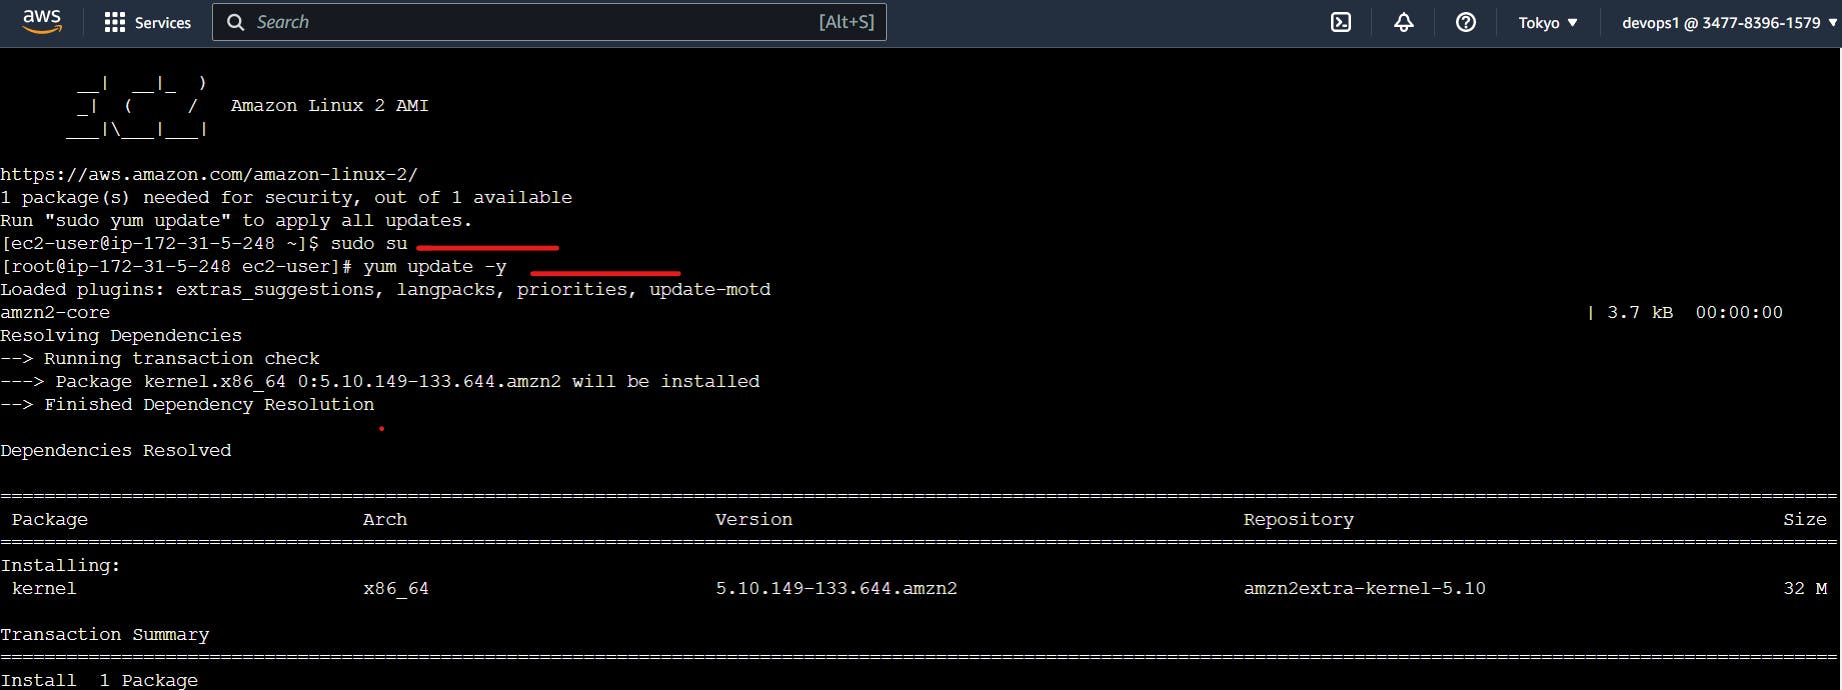
Commands Need to Https Service:-
- $yum update -y - For updating the Packages
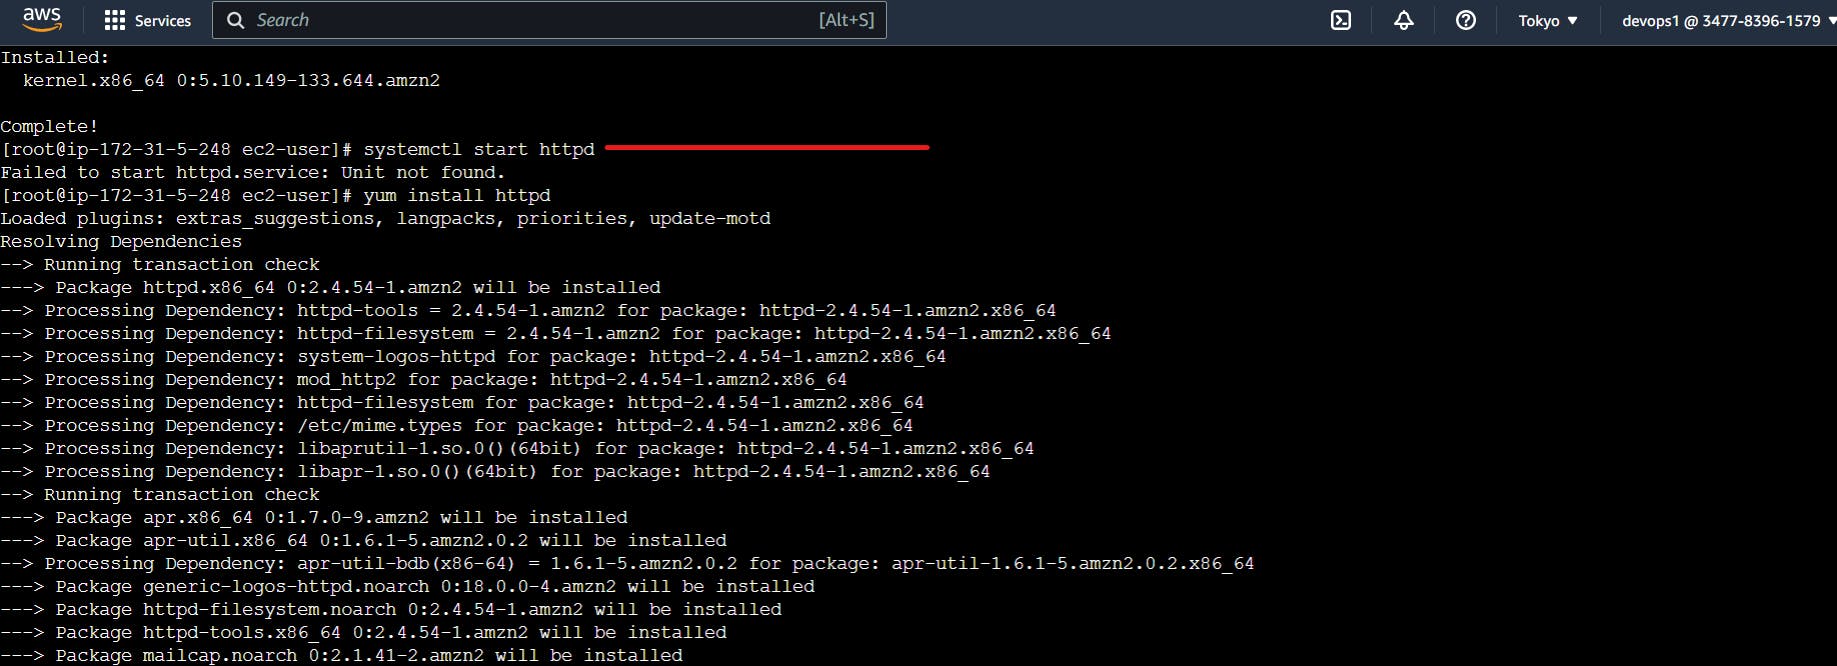
- $yum install httpd - For installing httpd service
- $systemctl start httpd - To start the httpd Service
- $httpd - In order to recheck service is running
- $systemctl enable httpd - for the autostart httpd service (to avoid again and again start httpd service)
Step 1. Install , Start & Update httpd
>
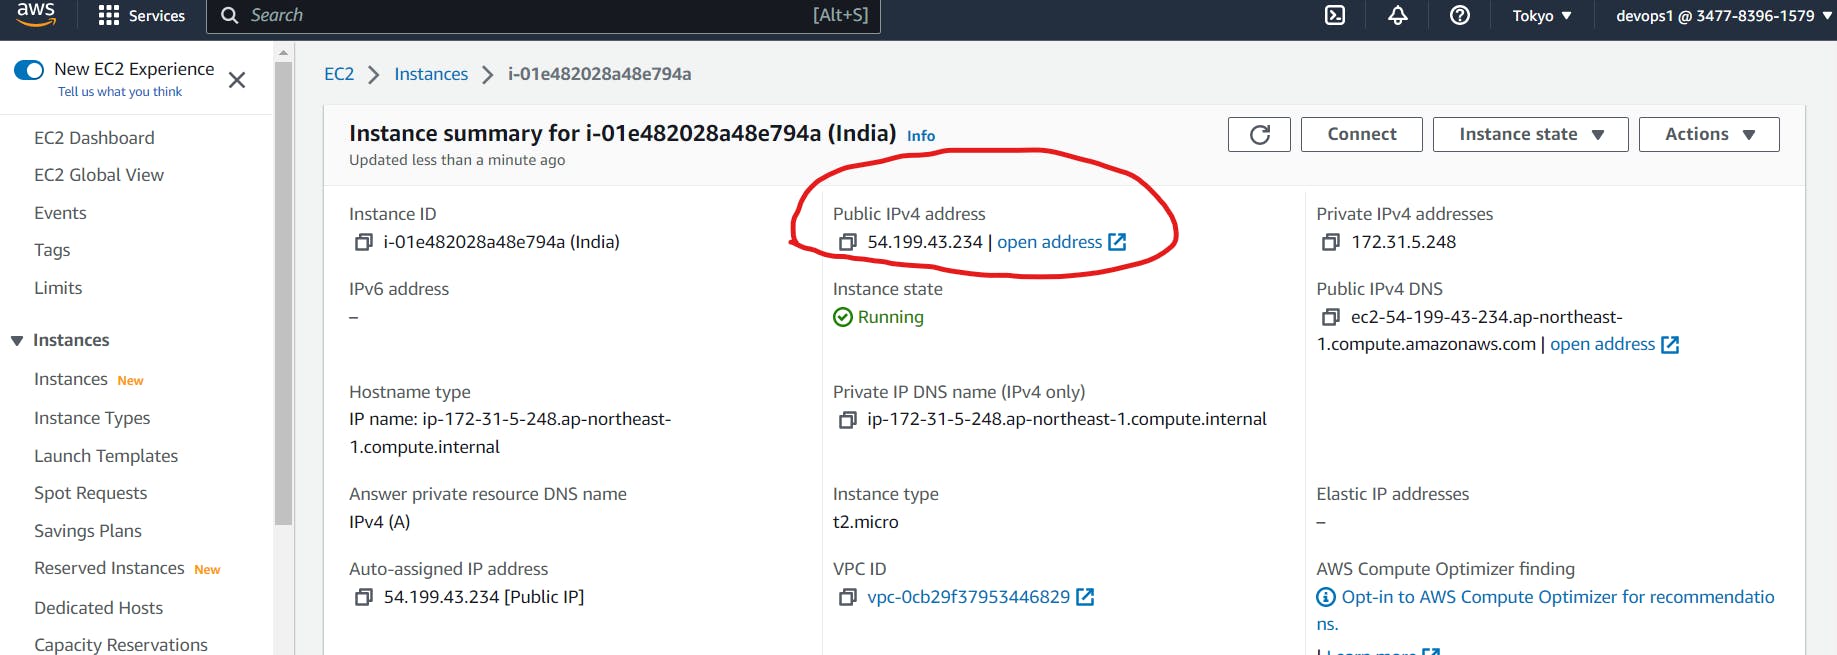
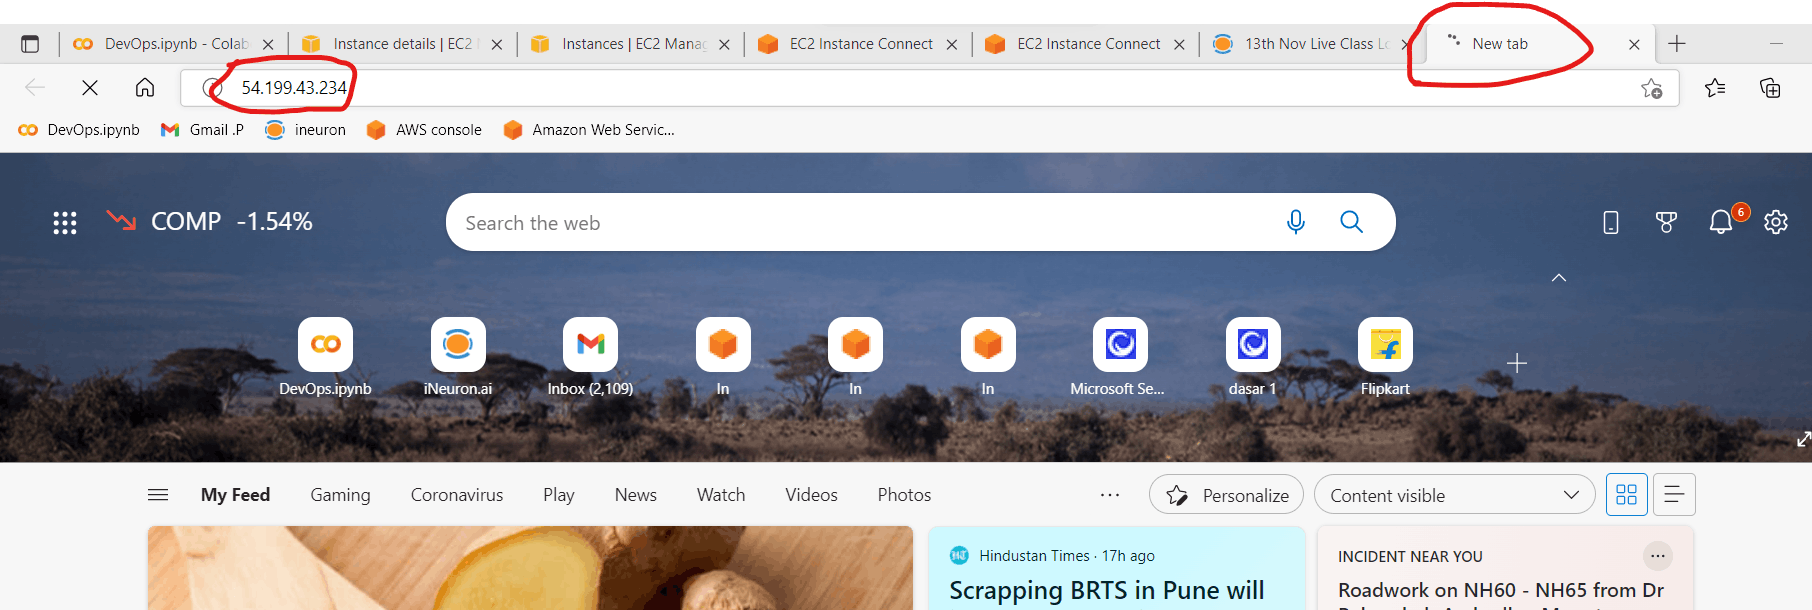
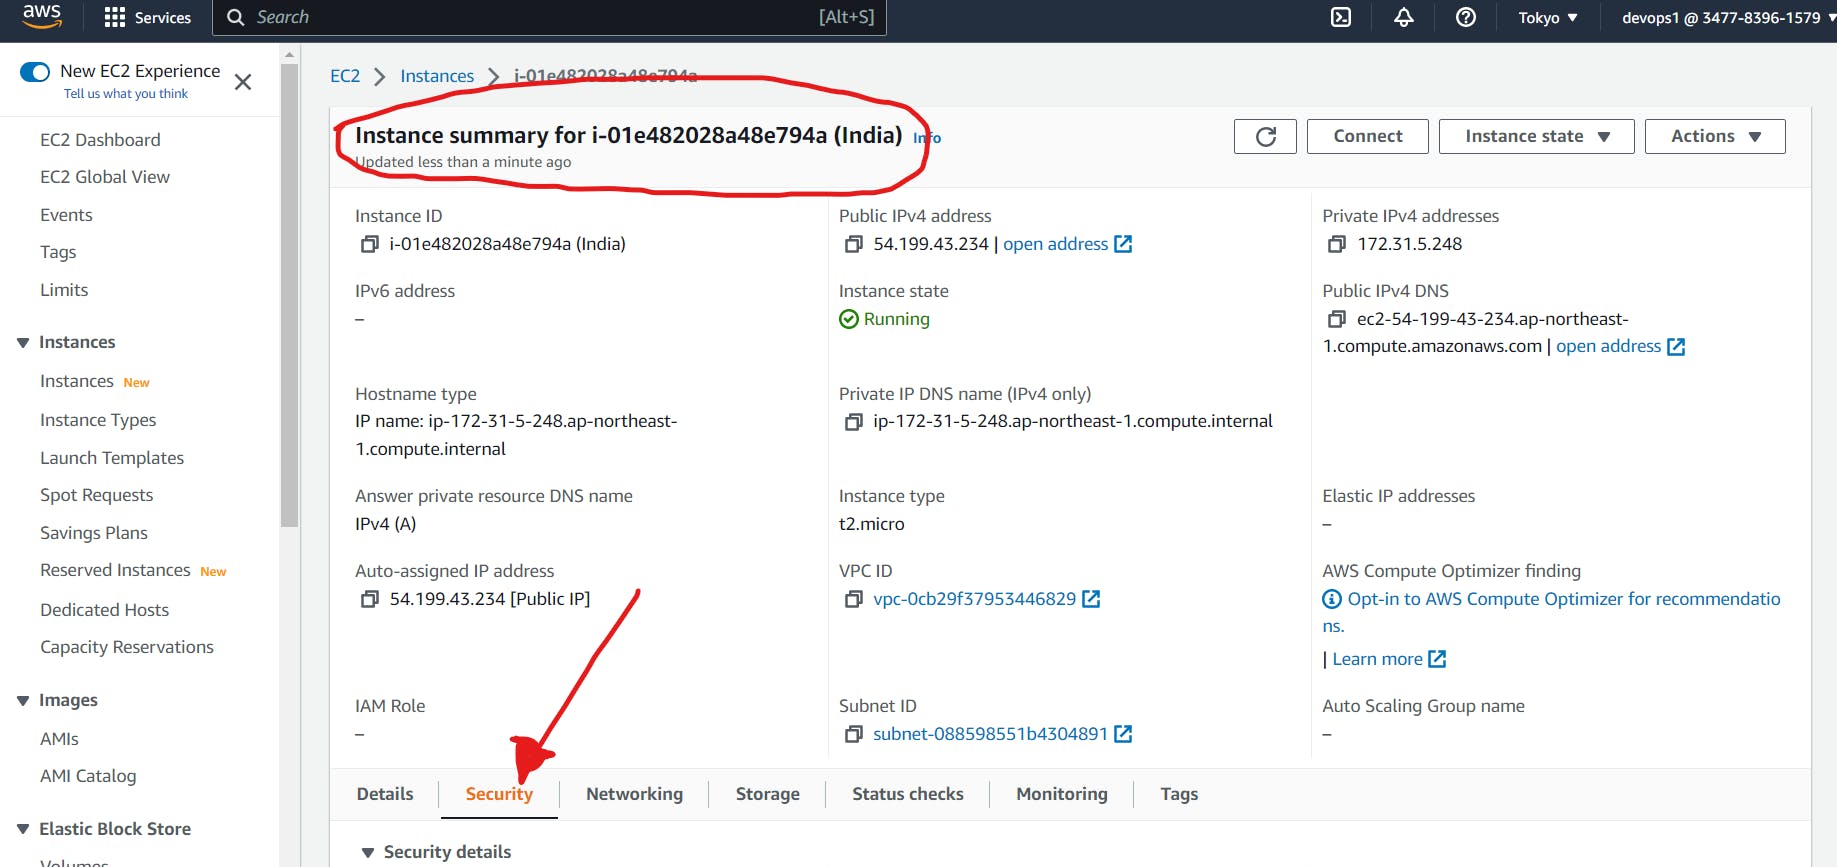
• Because of httpd service enabled > we can access through Public ip address also.
- Check Your Server through Public IP running or Not.
>
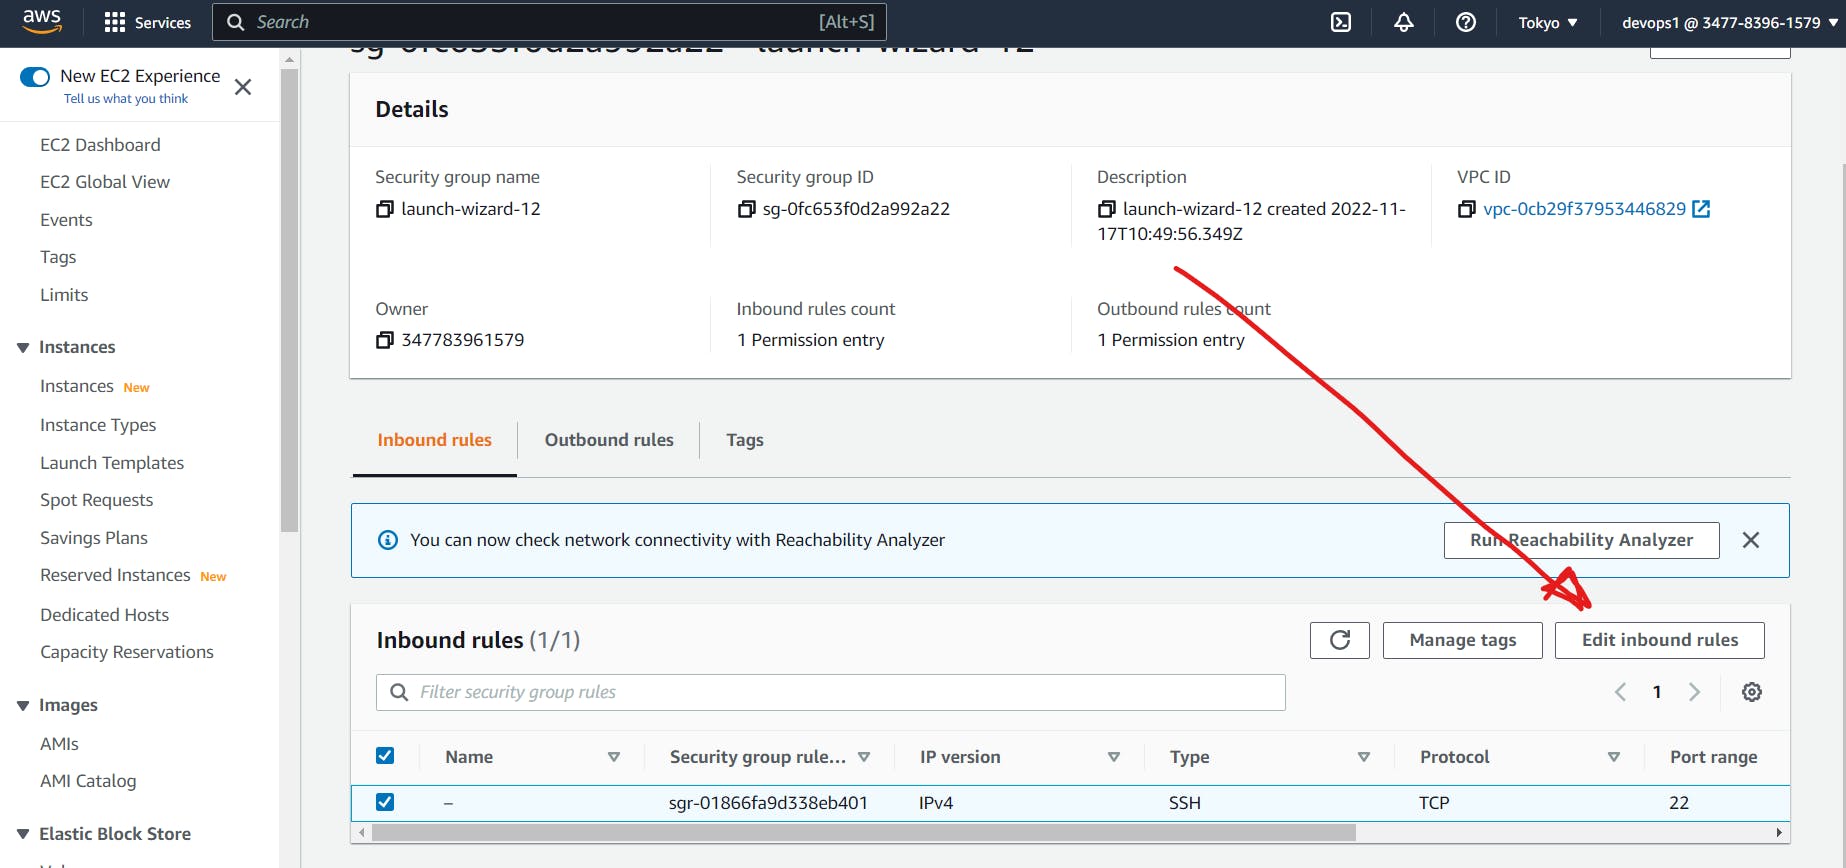
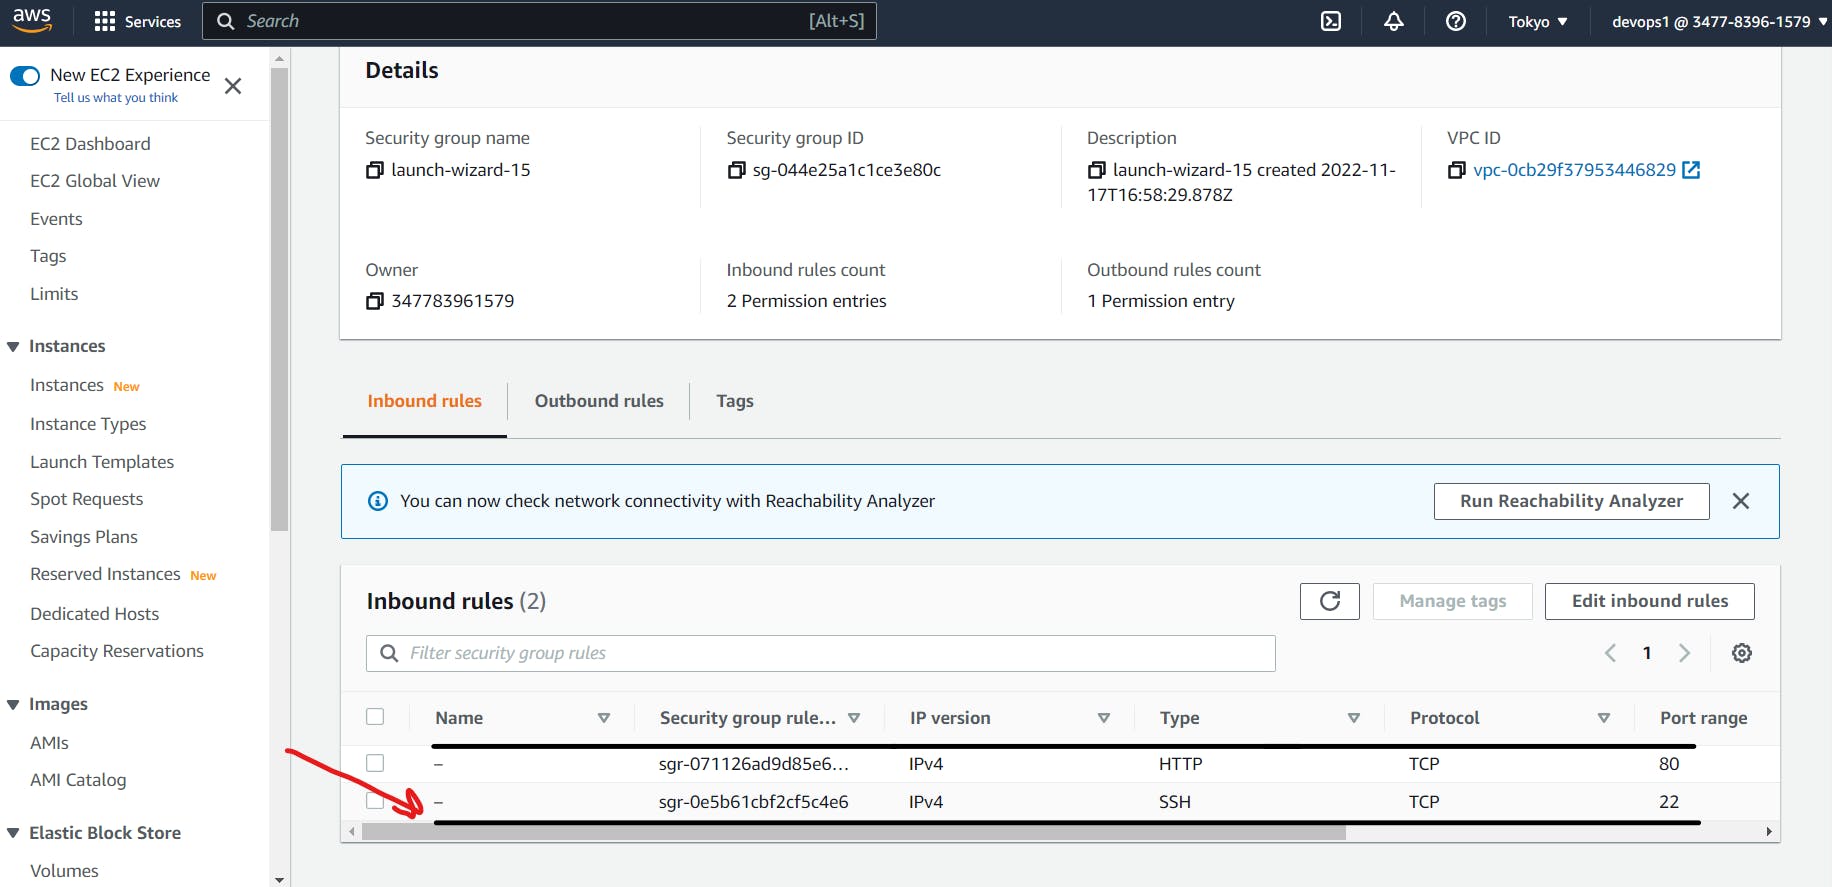
For checking INBOUND & OUTBOND RULE
- INBOUND - Traffic Coming from the internet on the machine
- OUTBOND - Send info Over the internet
Step 2. Setup inbound and Outbound Rules
>
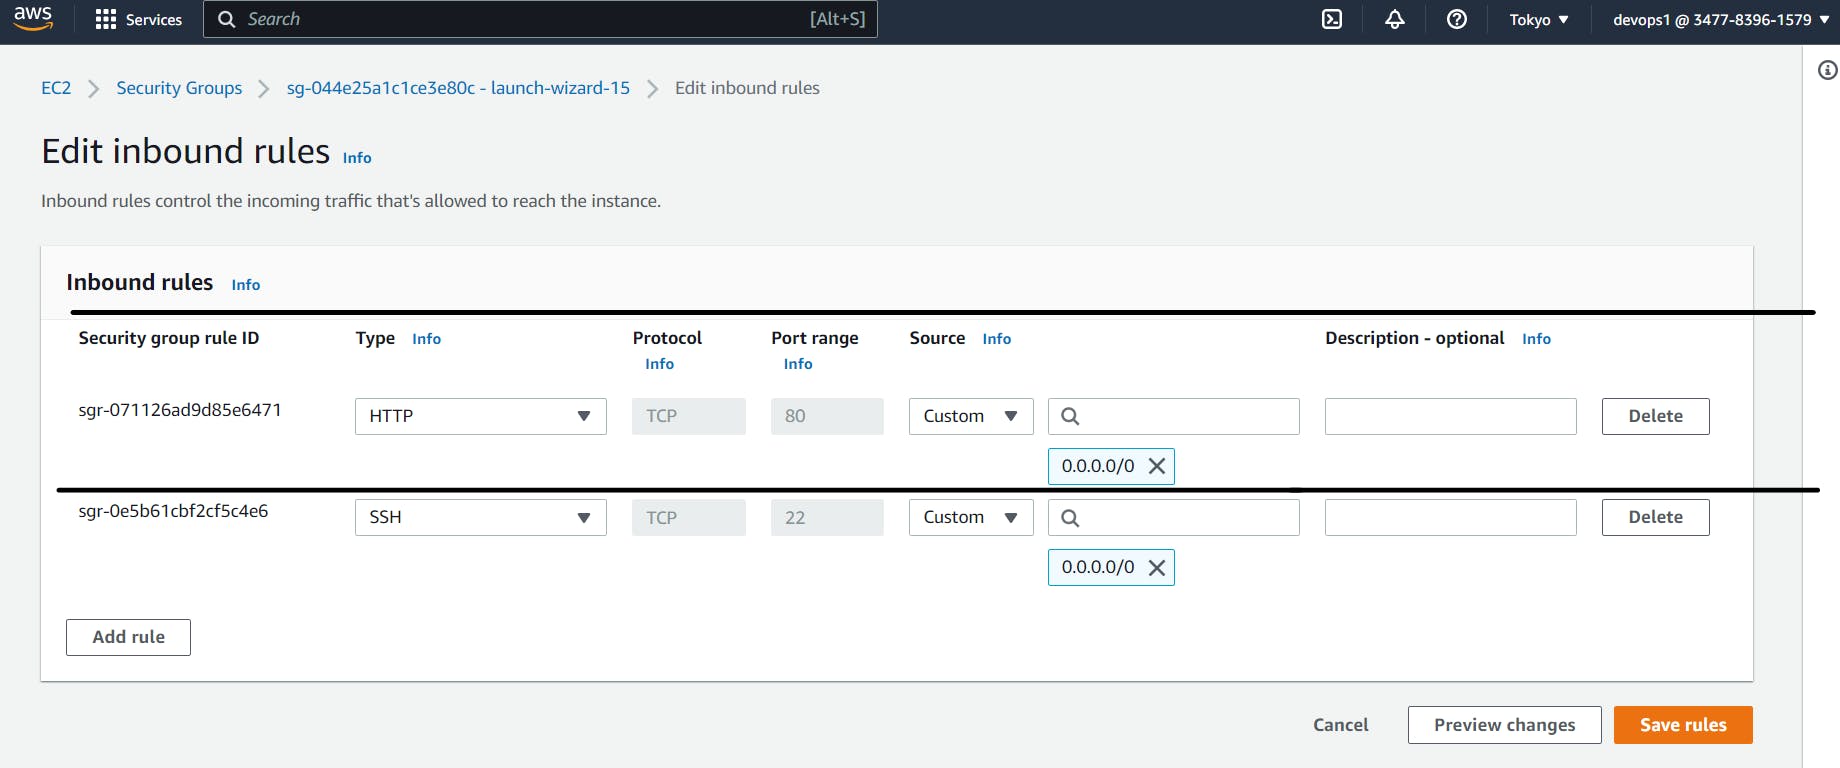
>
Step 3. Edit Outbound Rules Also Same
>
Step 4. Check Your Appache Server Now
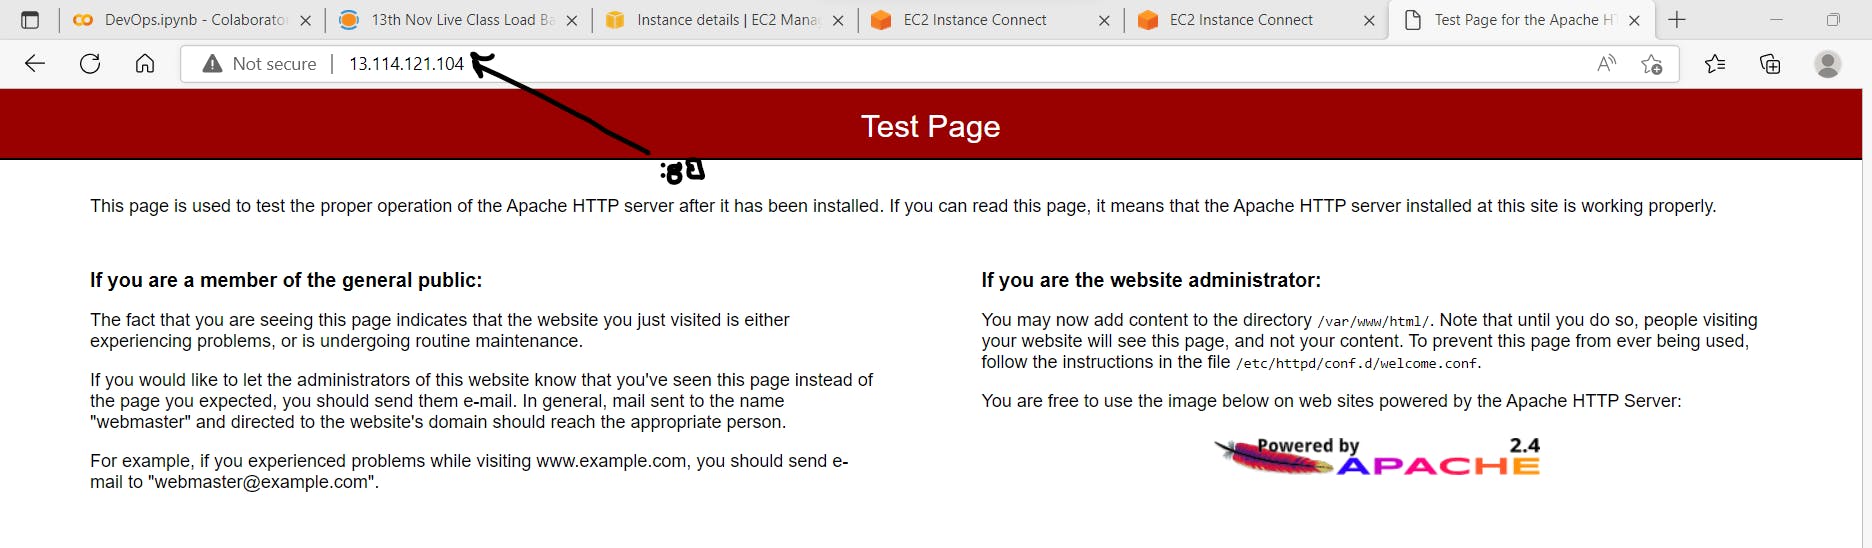
Now See OUTPUT of Public IP >> U R APACHE Server is Running On Over the Internet
Now U hosted Ur Server Successfully.
Creat load balancer using AWS
Cloud Services
- IAAS (Infrastructure as a Service)
(taken care by client)
(Application)
(Application Runtime)
(OS)
This is taken care by cloud provider (virtualization) (Physical Hardware) (NETWORKING)
- PAAS (Platform as a service) (Application)
All the below services are take care by cloud provider (Application Runtime) (OS) (virtualization) (Physical Hardware) (NETWORKING)
- Elastic load balancer :- Distribute incoming traffic across multiple targets
- Amazon RDS :– Relational databases – MySQL, Oracle, SQL Server
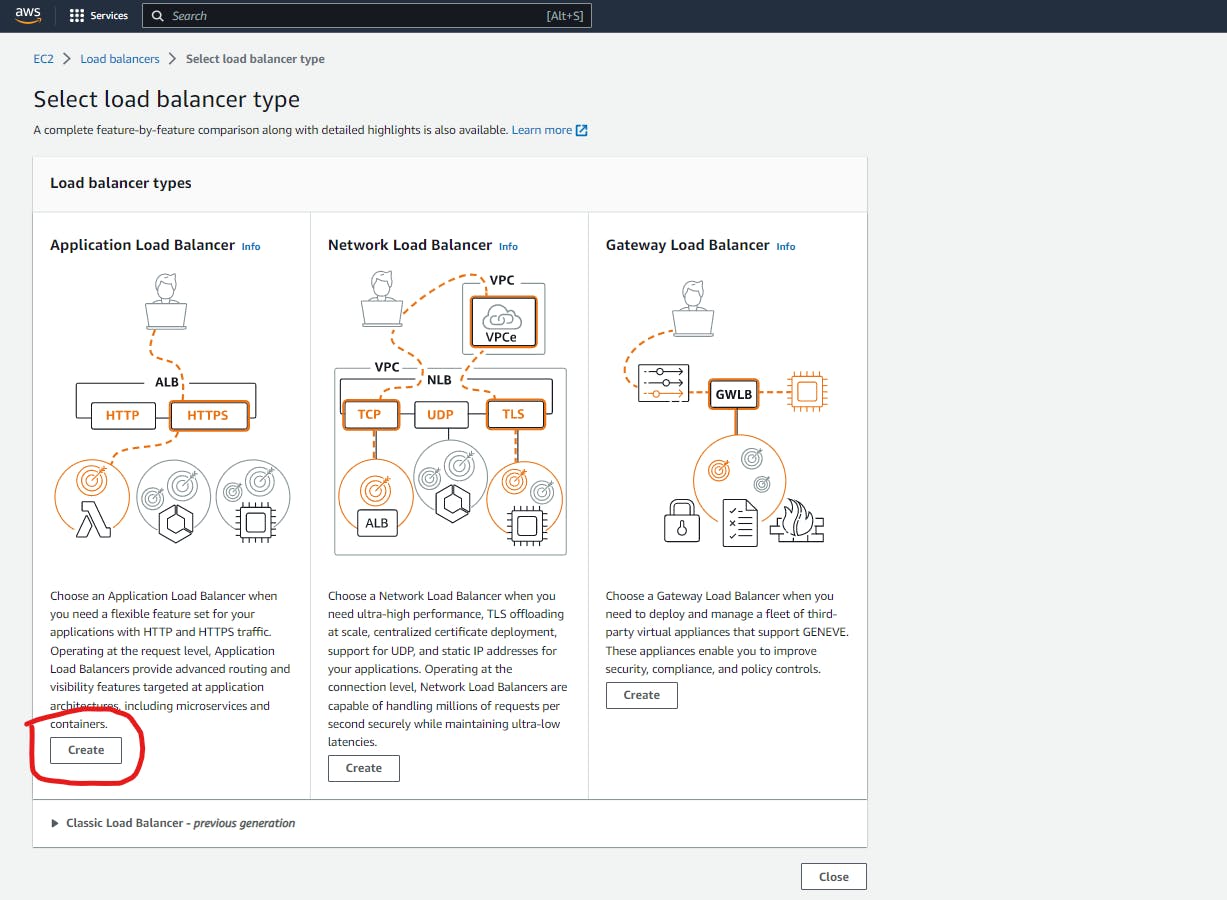
Three types of ELB :-
1. Classic Load Balancer :- Old generation type :- (TCP / TLS) (Not recommended)
2. Application Load Balancer
- New generation type :- Http/https
3. Network Load Balancer
- New Gen type :- TCP & TLS & UDP
- Very high performance
Step 1. 1 Go to Load Balancer from Load Balancing
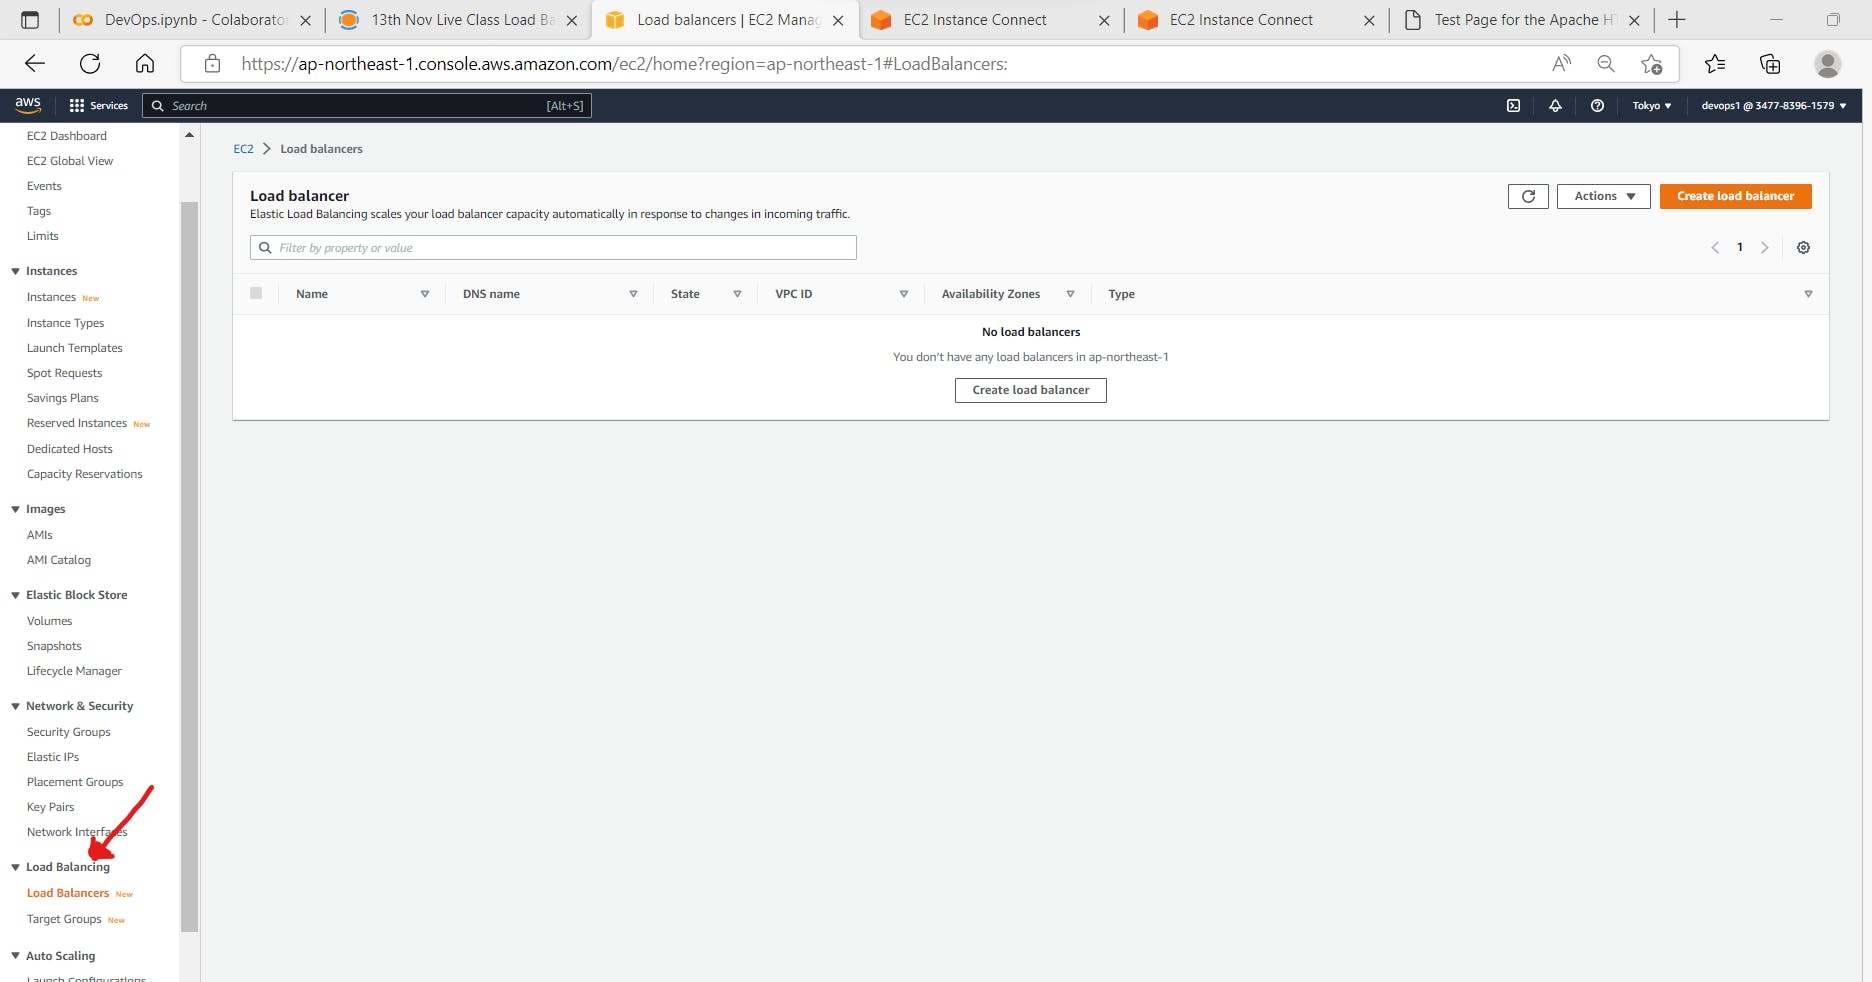
> • Click on Creat Load Balancer
• Click on Application Load balancer for >> Creat
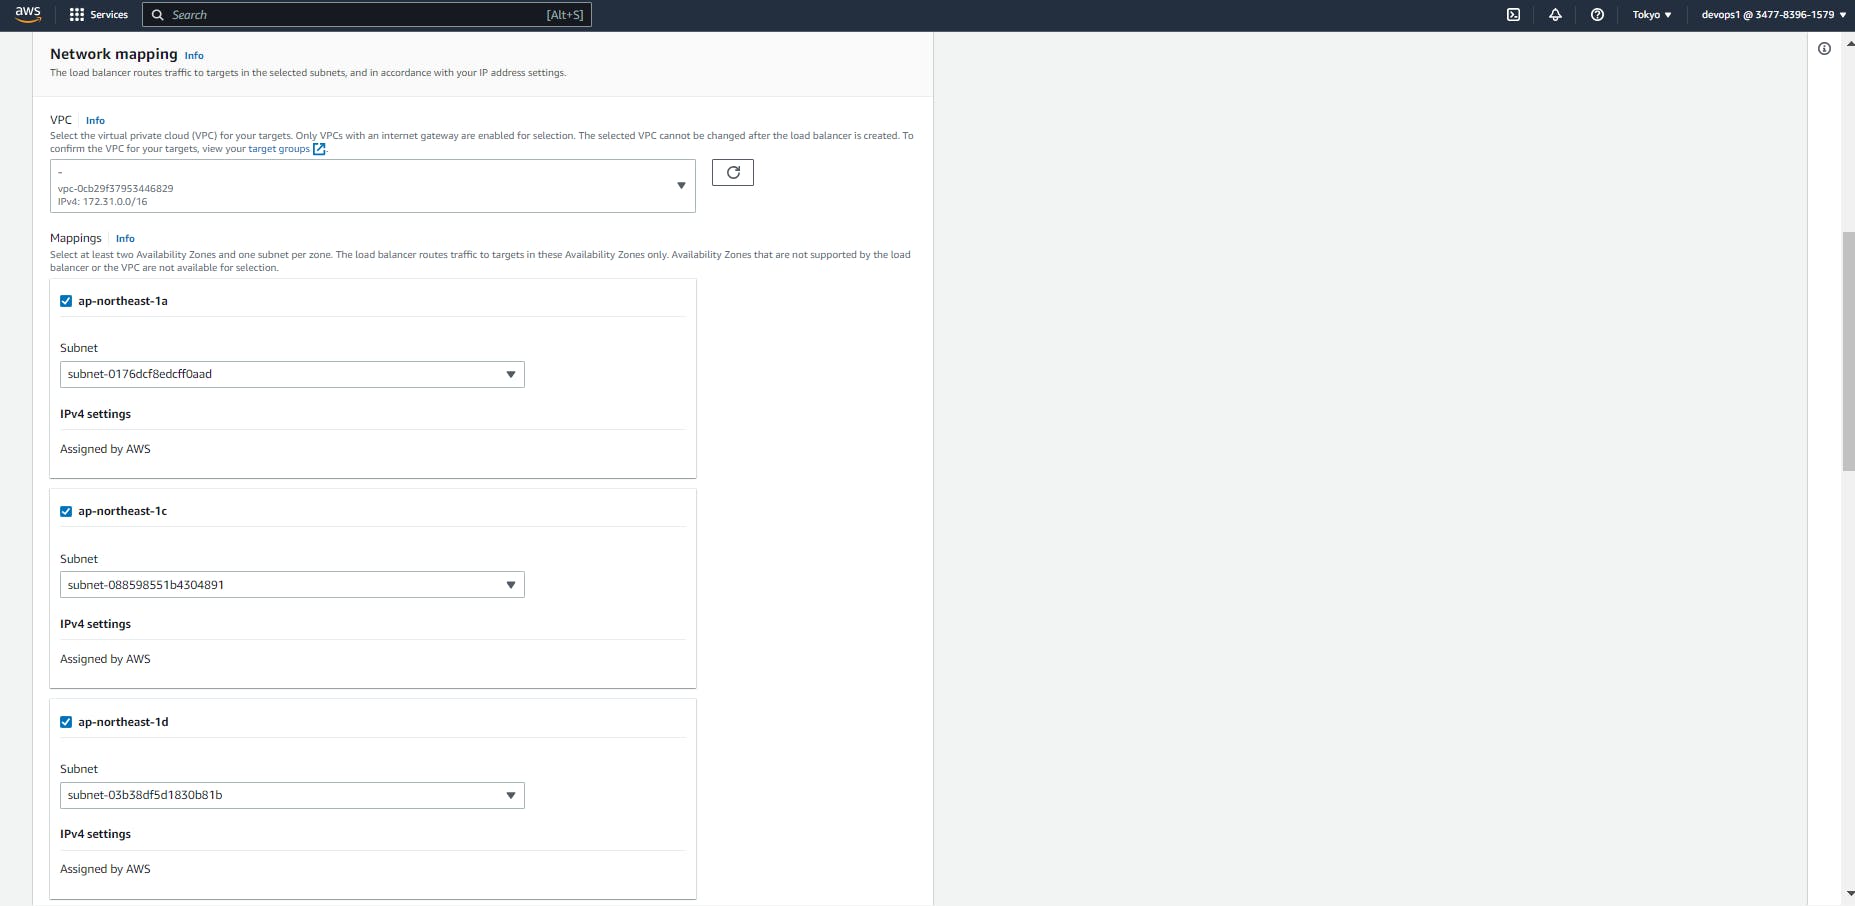
>
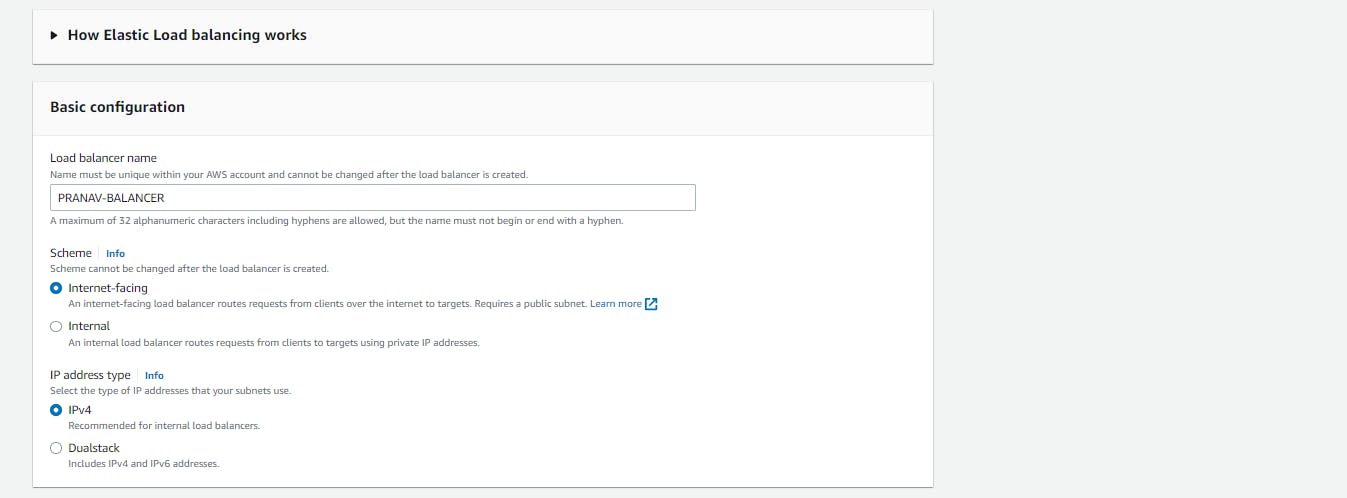
>
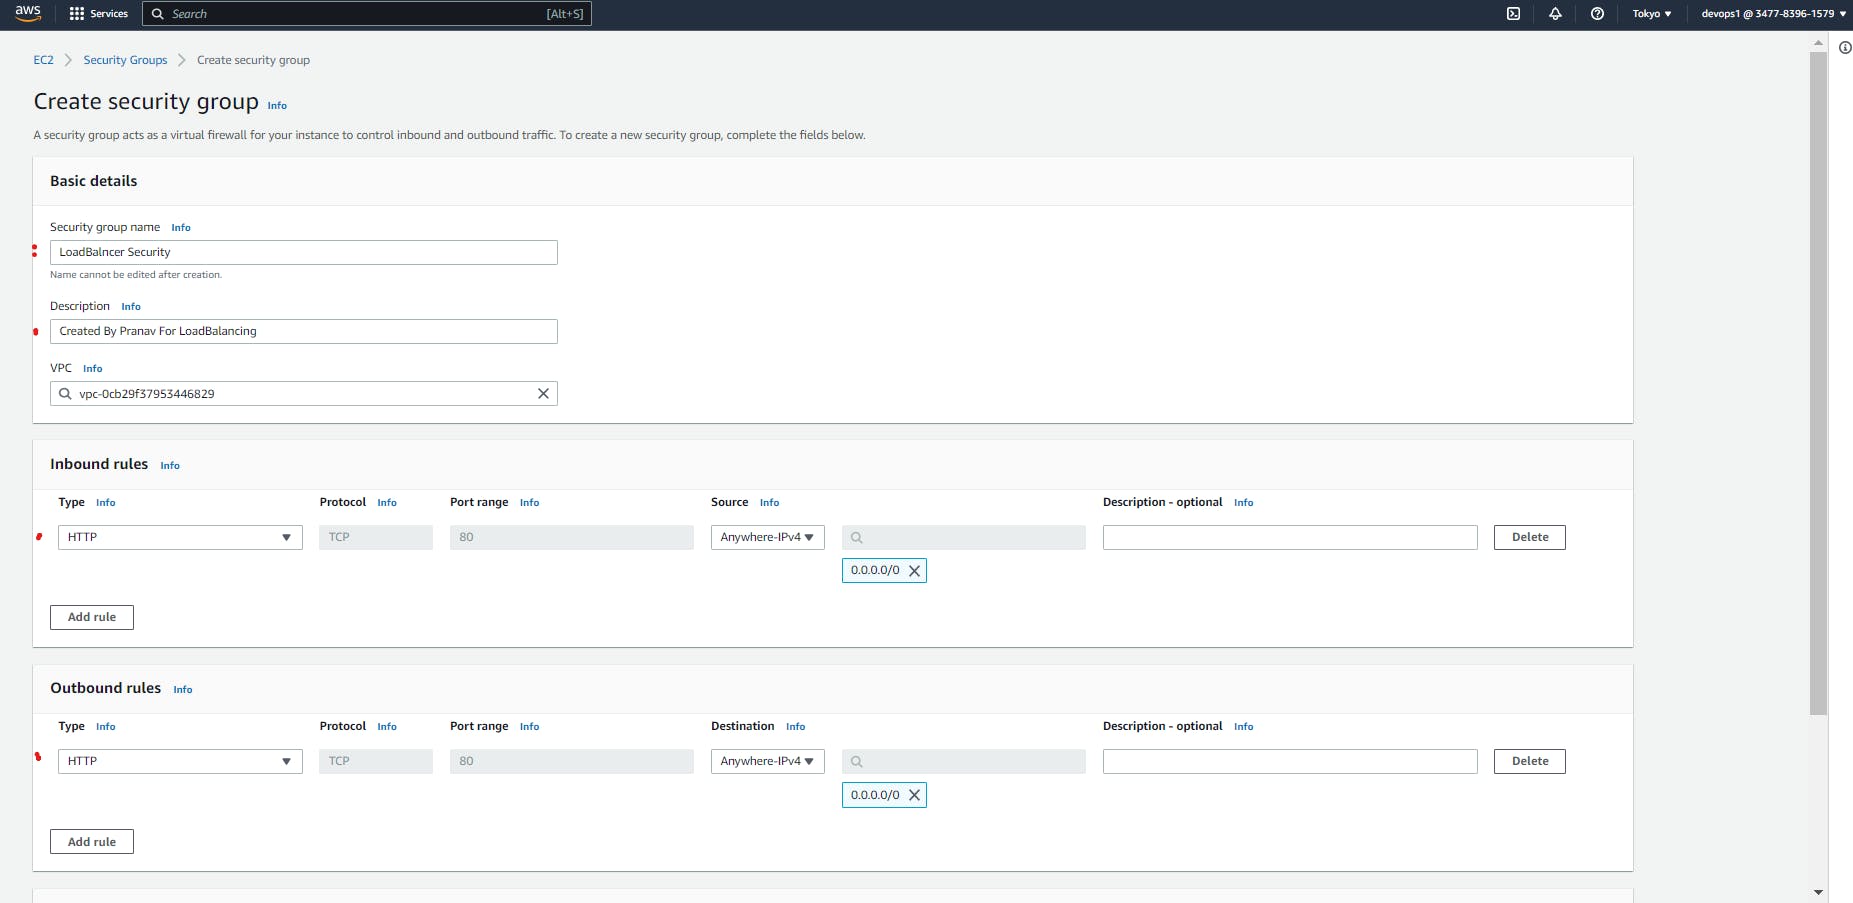
> Creat New Security Group with name and HTTP for Inbound and Outbond
>
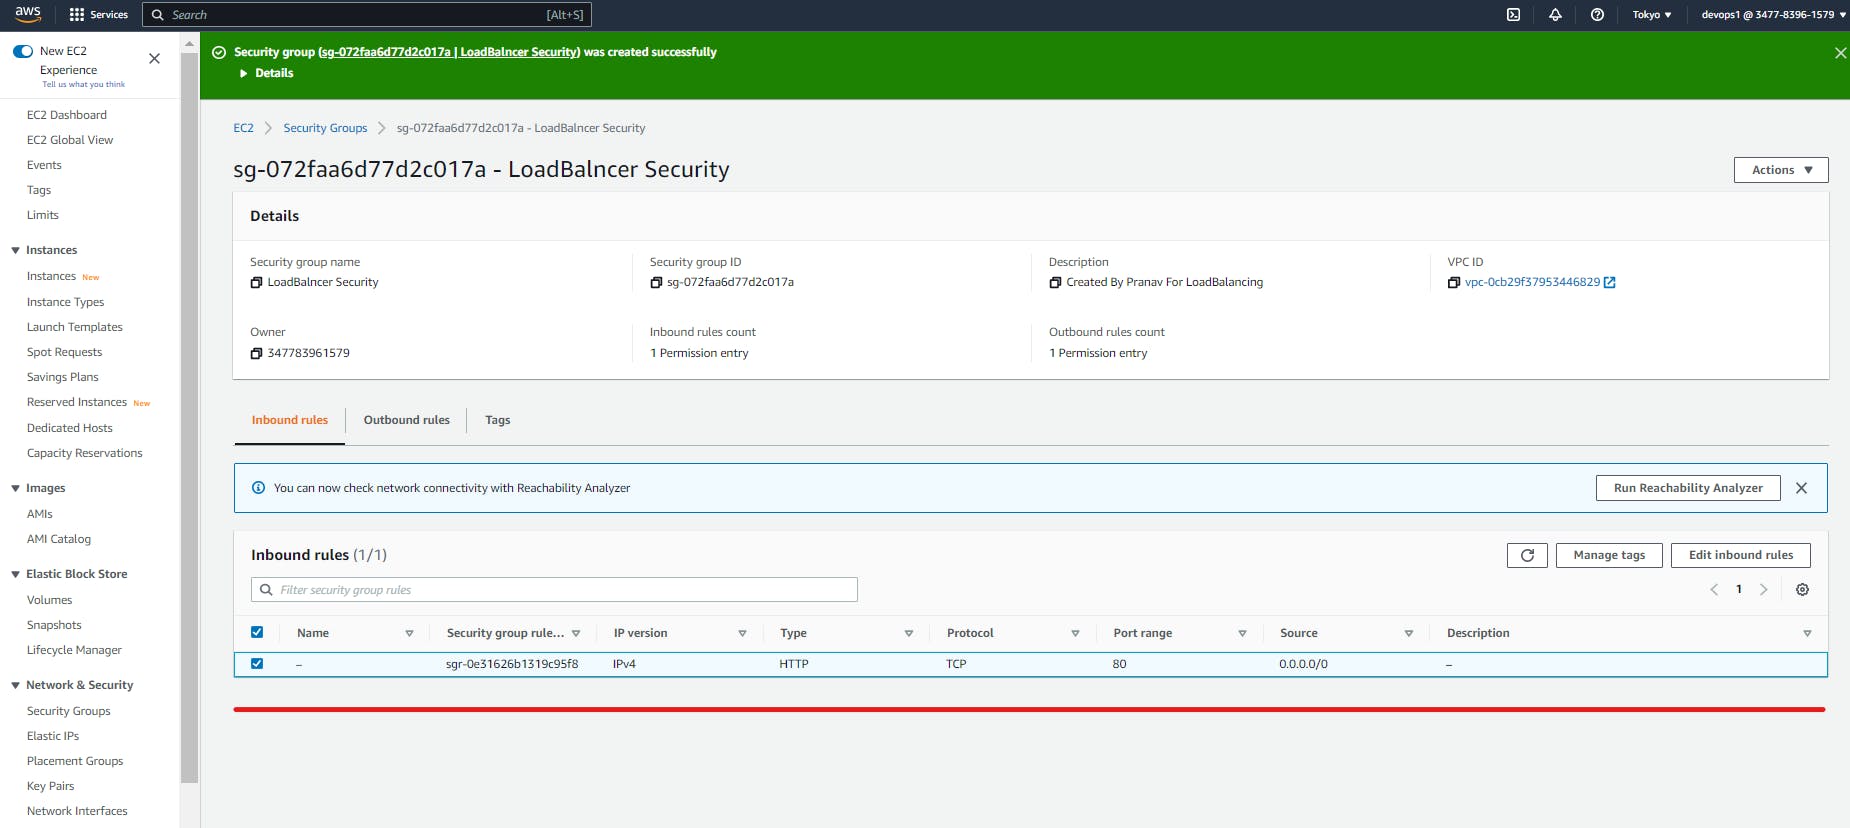
Step 2. Click on Creat Security Group
>
Step 3: After Creating Security Group > We have to add this Security in Security Group (Create Application Load Balancer) by Refreshing Security Group
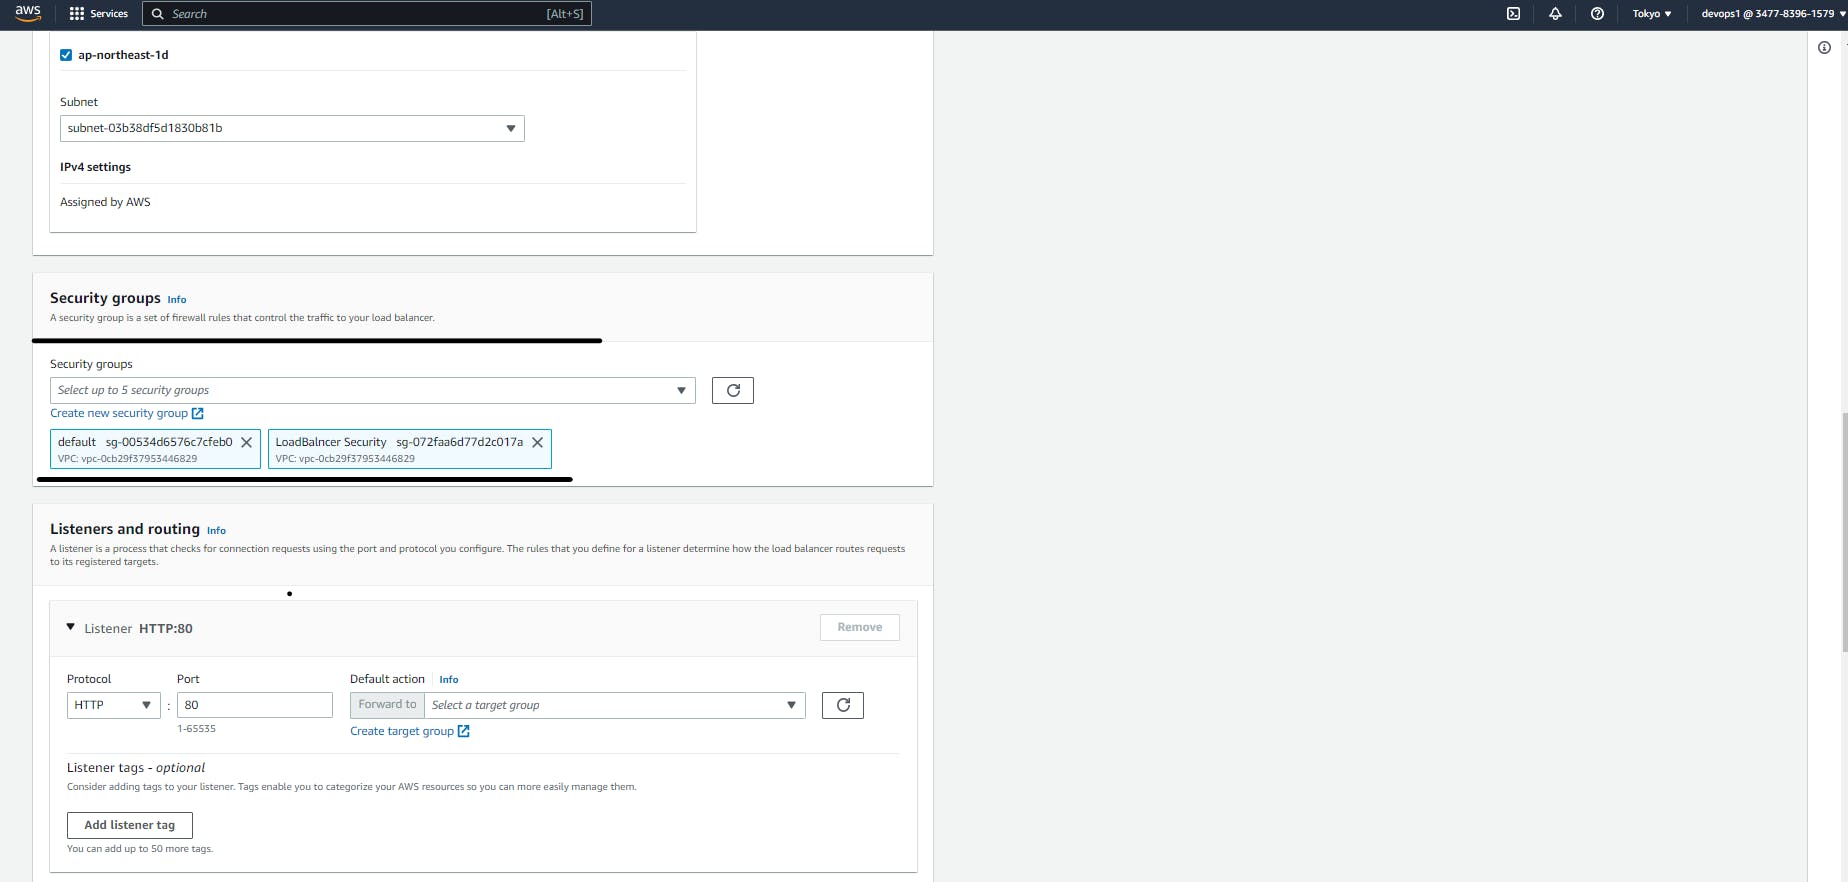
Step 4. From the Listeners and routing Creat a Target Group
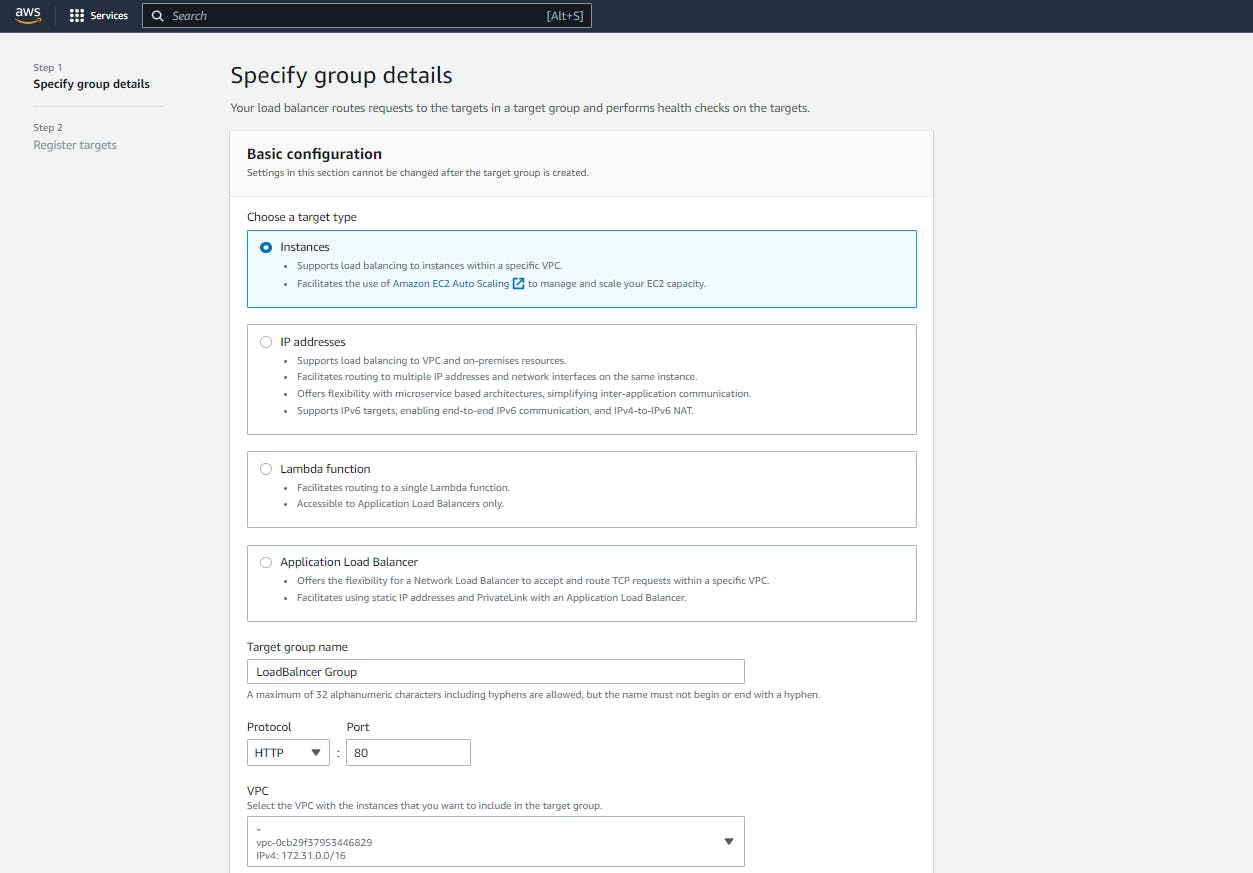
>
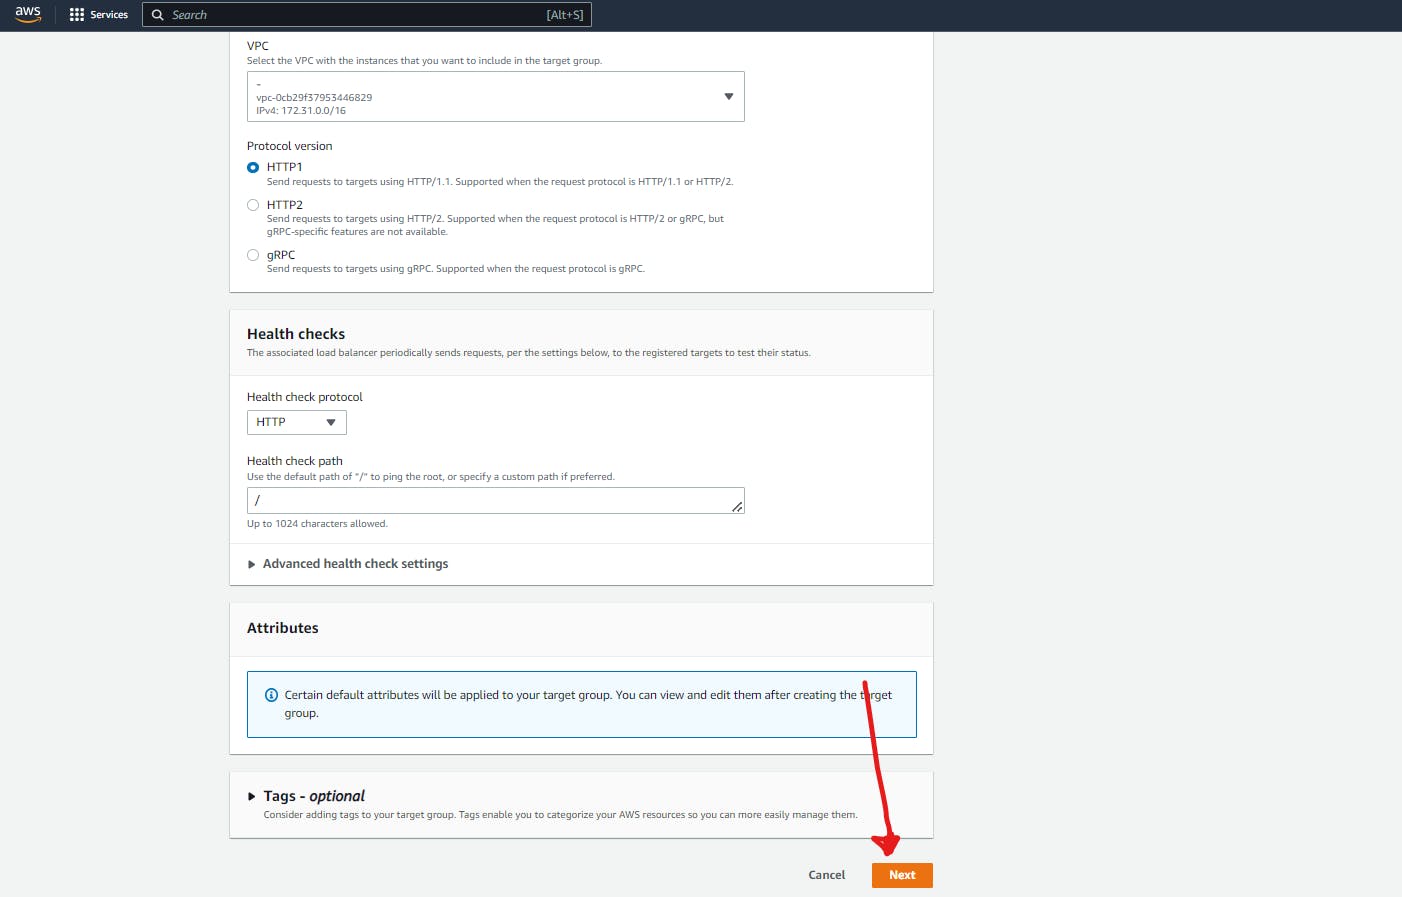
>
Step 5.Select the Instances which on that we have to creat Load Balancer
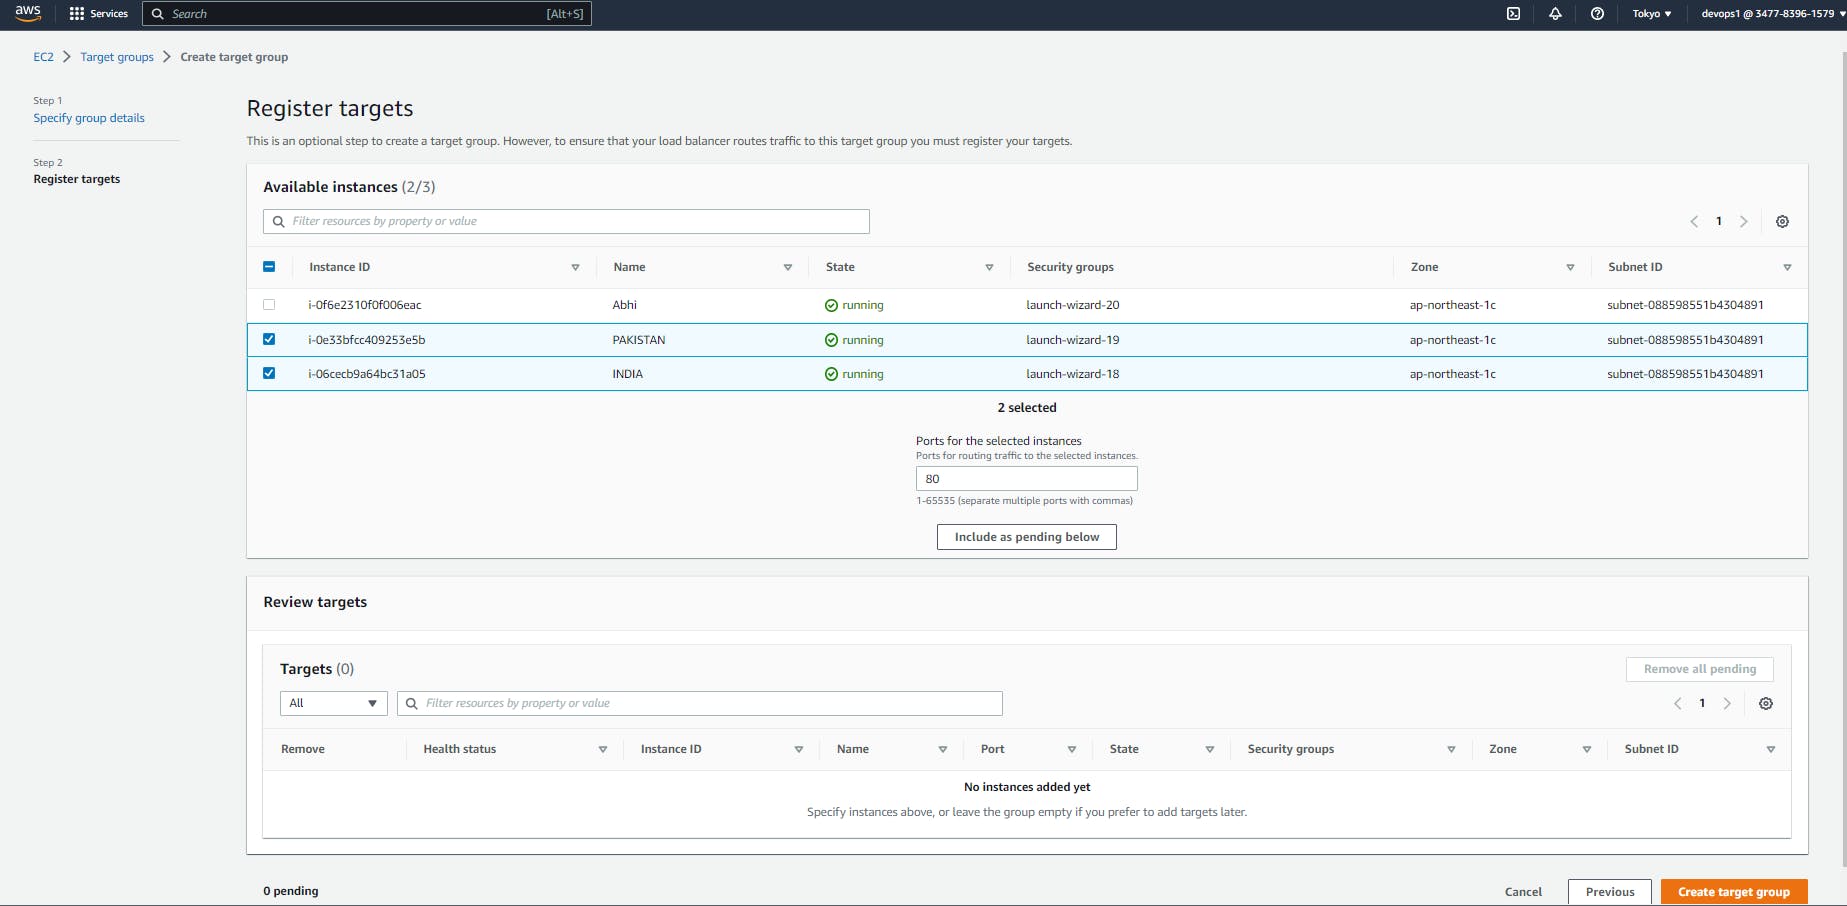
Step 6 . Click on Include Pending Below:
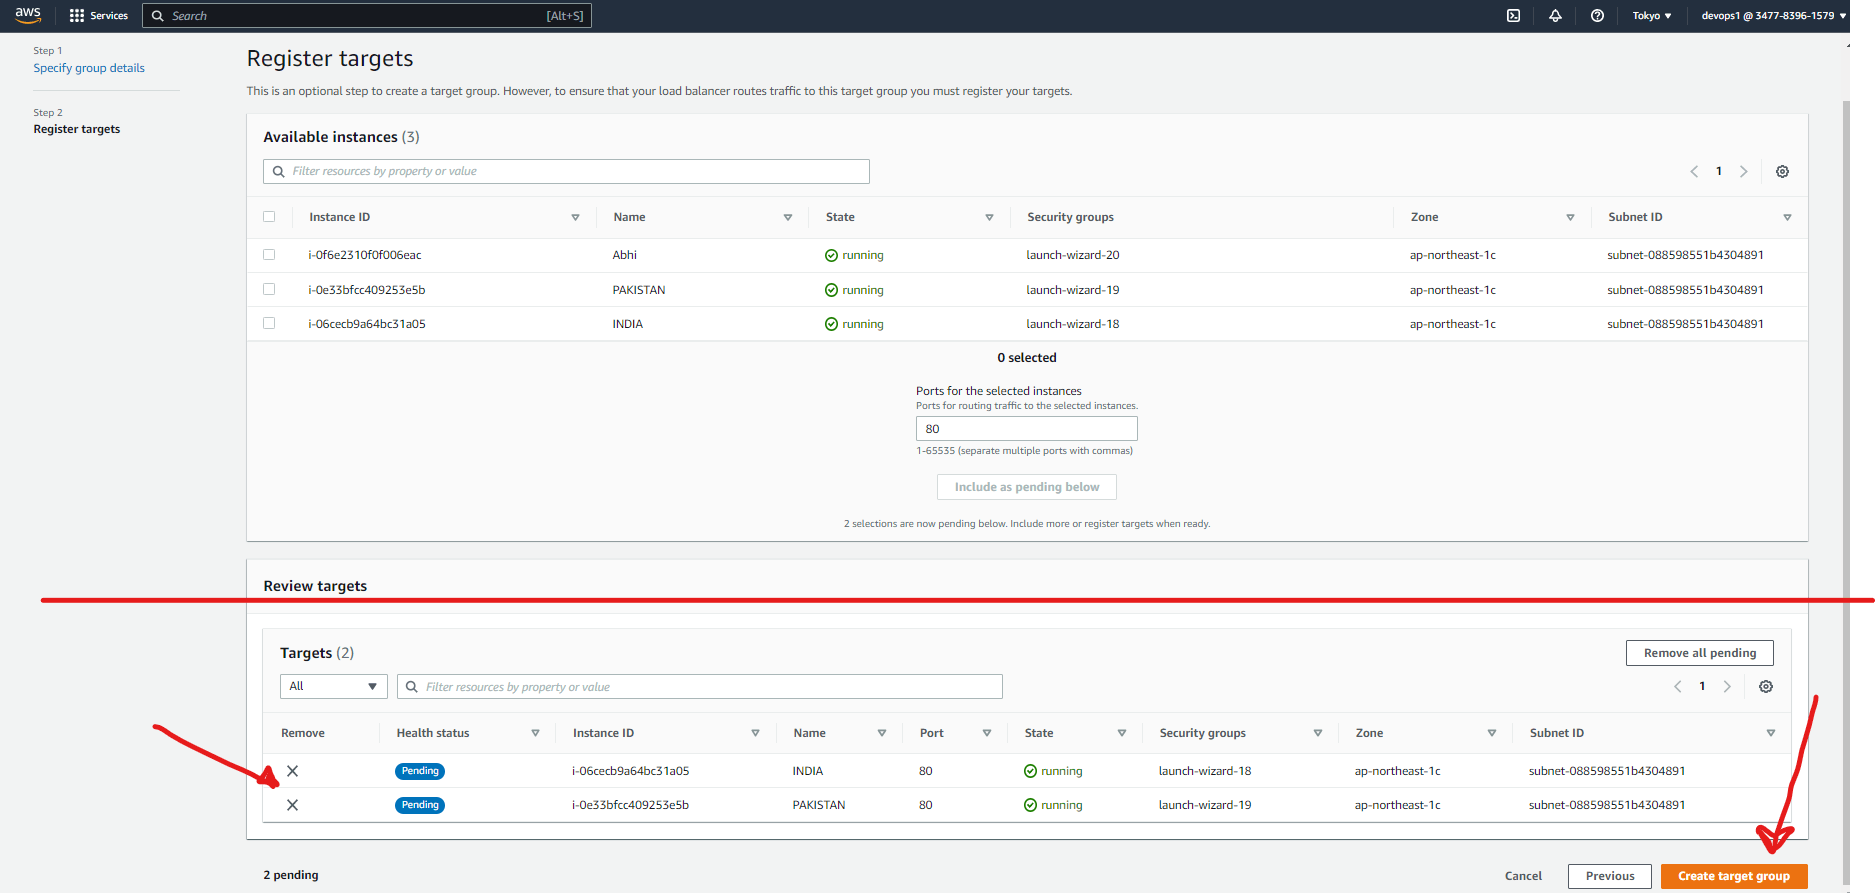
>
Again Come to 'Listeners and routing' and Add the Default Group as U have Already Created Target Group.
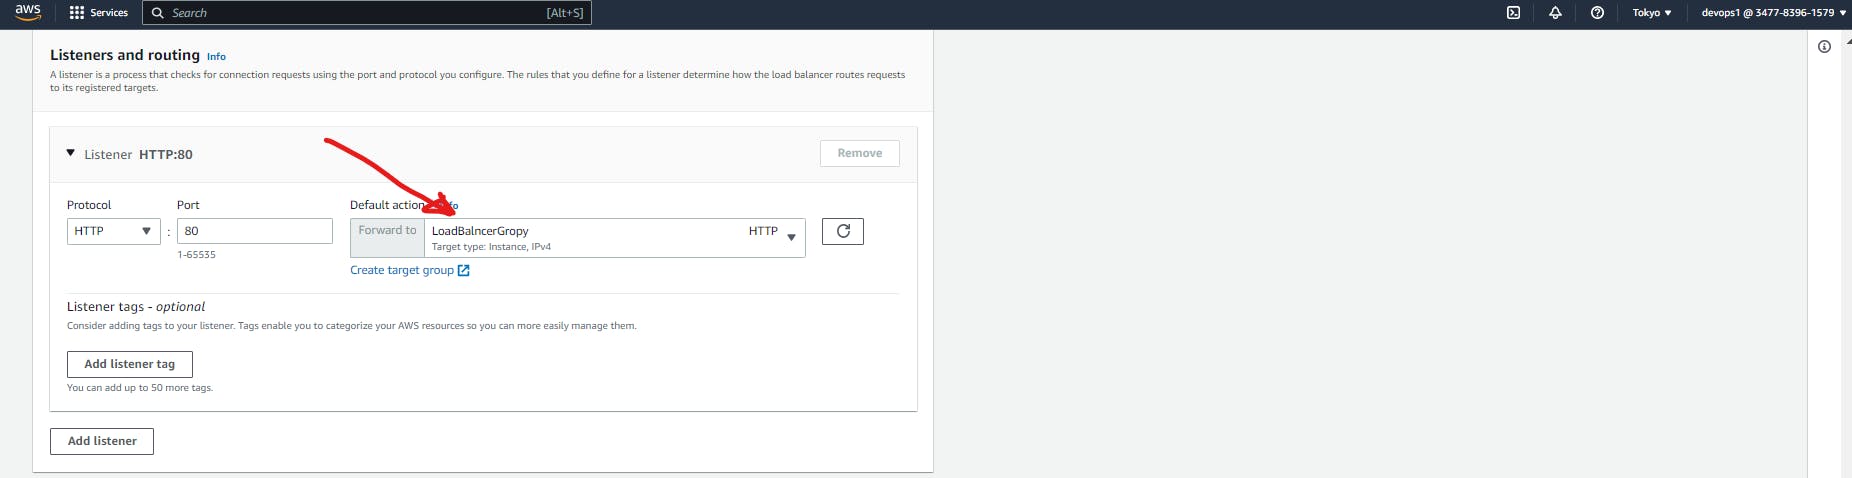
>
Step 7. Now click on Creat Load balancer
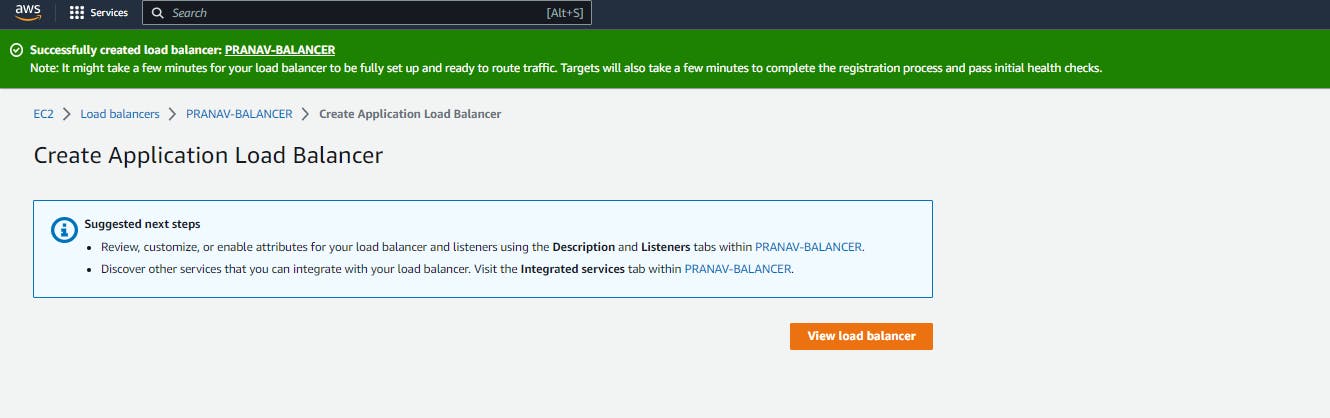
>
>
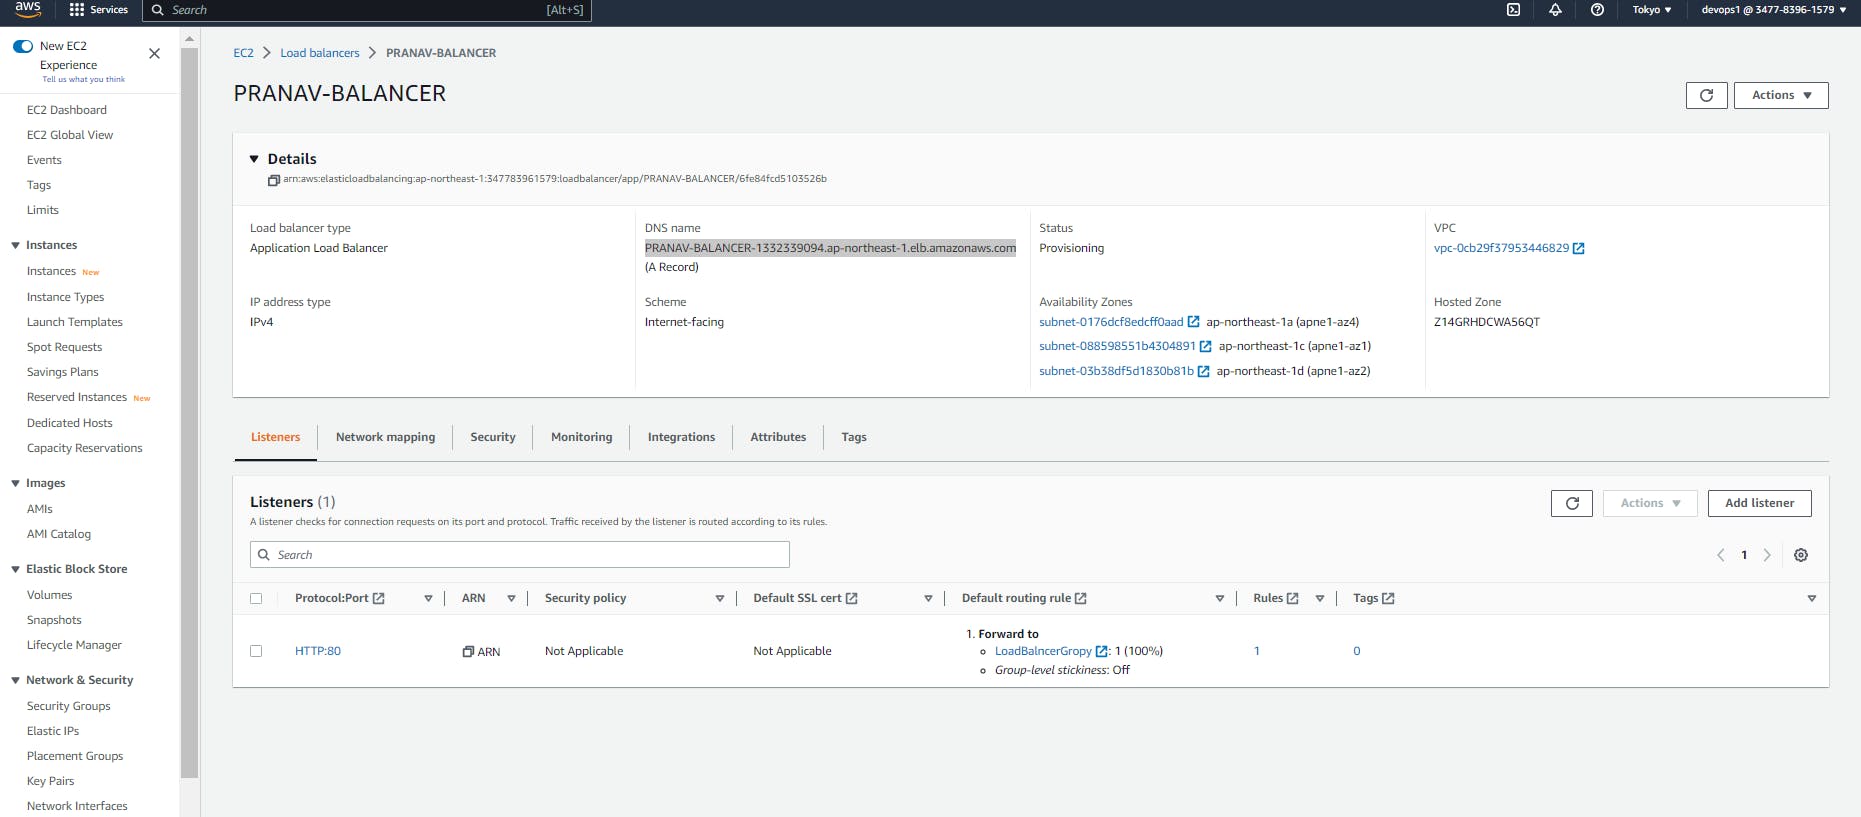
Final Stage:- When Ever we Refresh it url it will Shows Both the Server Side By Side

This is Our First Now >>>> Refreshed

